How to Decorate SIX Christmastime Cookies
What's included?
Here's a list of everything that's part of the kit - all with a 10% savings when purchased together!
Don't need all of these items?
No worries! You can buy just the items you want!
Pick what I needIt's time to kick off the Holiday Cookie Decorating Season with a new cookie decorating kit - The Christmastime Kit! This kit and tutorial feature 6 different cookies and it also has the Holiday Sprinkle Tackle Box!

The Sprinkle Tackle box features sugar, sprinkles, candy canes, ornaments, and nonpareils! It's so much fun to use with Christmas Cookies!

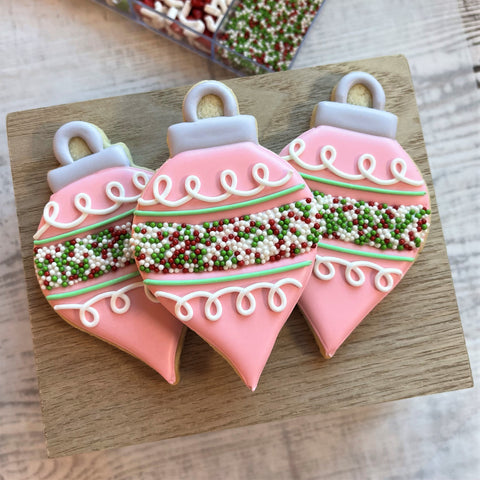
This tutorial includes a step-by-step look at SIX Christmastime cookies. These cookies are great for beginners...or for pros that are making TONS of Christmas cookies and want to keep them simple.
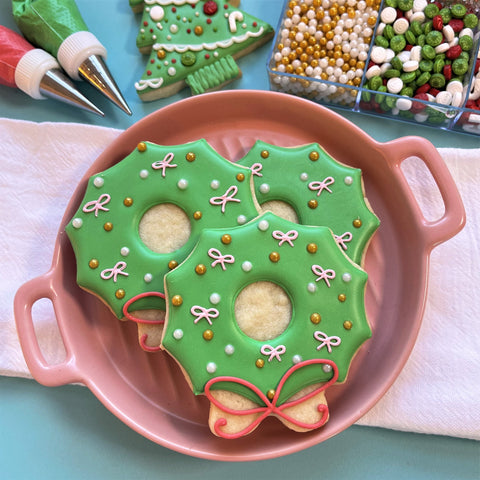
Cookie Yield
For a single batch of dough, you can make about 20-24 of these cookies (about 4 of each). I should note that I roll my cookies to 1/4" thick using the Dough EZ Rolling Mat System. The thickness of your cookies will impact your yield.
COOKIE RECIPE: For a cookie recipe and rolling and baking video CLICK HERE - this recipe can be doubled in a KitchenAid Mixer.
Prepping the Royal Icing

This is the beautiful color wheel from this set.
ICING PREP
This set features 4 gels. I used the Christmas Red in a light and dark tone and the Leaf Green in a light and dark tone. Avoid over coloring your icing by putting a small dot the spatula.

Check out the icing guide below for tips on making the right colors and an estimate of how much of each color you'll need.
For a single batch of dough, I typically use a single batch of icing. Since I'm using a KitchenAid mixer, I made a double batch of icing and split it in half (reserving half for another project).
ICING GUIDE
The Christmastime cookie set has 4 gels/6 icing colors.

ICING PLAN BY THE OUNCE
Here is what I suggest making for a single batch.
Gray - 1 oz (20-second only)
White - 4 oz (pipe and flood)
Light Green - 4 oz (pipe and flood)
Green - 4 oz (pipe and flood)
Pink (pastel red) - 4 oz (pipe and flood)
Christmas Red - 4 oz (pipe and flood)
These amounts are ESTIMATES. When it comes to how much icing to make, l don't measure exactly...I estimate. For a more detailed look at icing planning, CLICK HERE to read this helpful blog post.
ROYAL ICING RECIPE
For a royal icing recipe and video CLICK HERE - this recipe can be doubled in a KitchenAid Mixer.
Project Timeline
Plan ahead to enjoy the most success with your cookie project! I break up the decorating process. It works better with my life to do a little each day. Here is the schedule for this cookie project and estimated times on how long each phase takes.
DAY 1
Mix Dough (30 mins), Chill Dough (2 hours inactive time), Roll and Bake (1 hour), Mix Royal Icing and Prep Icing Colors - it is helpful to make the colors (especially red) the day before you decorate because the color will deepen overnight. (1 hour)

DAY 2
Outline and Flood Cookies (1-2 hours), Allow to dry in front of fan before adding details (1 hour for standard cookies). Piping details (1-2 hours).
**ALLOW COOKIES TO FULLY DRY 18-24 HOURS BEFORE PACKING. STORE IN A COOL OVEN OVER NIGHT.**
DAY 3
For tips on packing cookies, CLICK HERE to check out this helpful blog post with links to my favorite packing and shipping materials.

Recreate these!
Pick up the Kit! It's got the essential cutters and stencils and a few bonus tools!

Common Tools Needed Not Included in the Kit:
- 4 Food Gels: Black Diamond, Leaf Green, Christmas Red, and Bright White
- 11 Icing Bags
- 6 Tip #2 (PME or Wilton brand)
- 1 Tip #1 PME (for the black and leaf green details)
- 6 Couplers
- Sprinkles
- Coffee Filter
Pin this Post and Tag Me!

I would be so flattered if you recreated these cookies! Be sure to tag @theflourboxshop or use hashtag #theflourbox so I can see what you create!
Happy Decorating!
Anne