How to Decorate a Carved Pumpkin
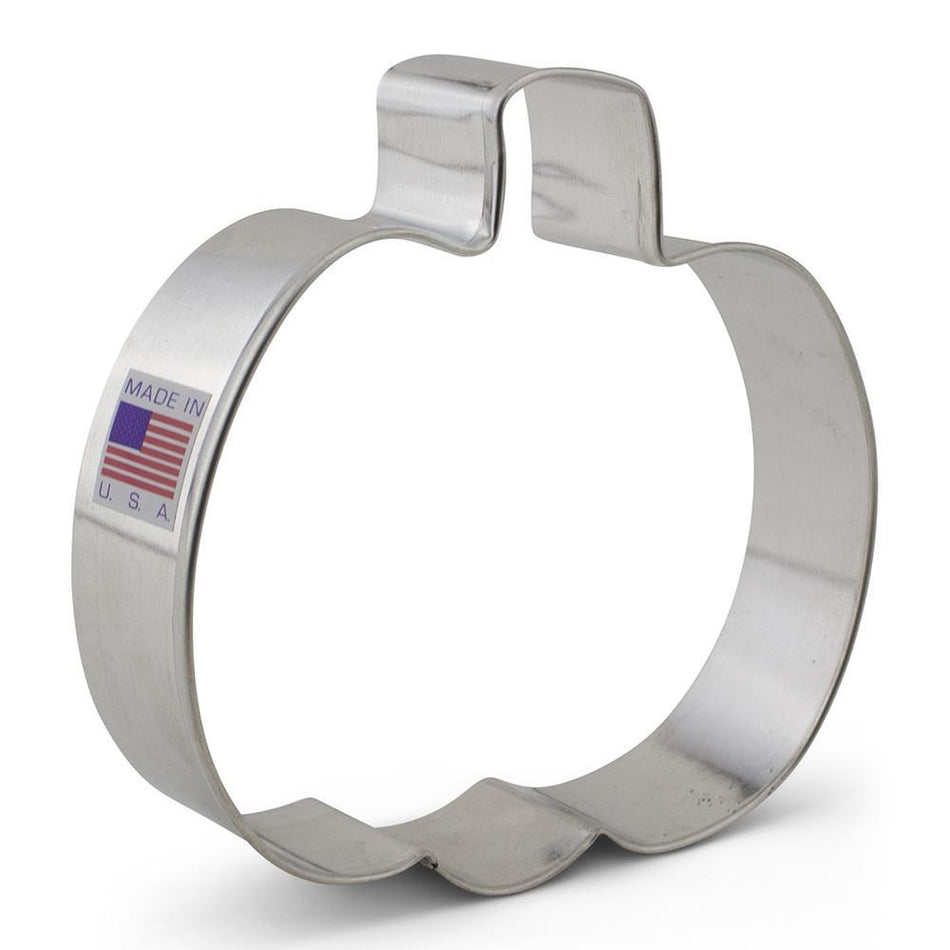
Pumpkin 4" Cookie Cutter
$1.79
Repeat after me, "I can create cookies with confidence!" You have what it takes, my fellow cookie fanatic. Just take a deep breath, follow the tutorial step-by-step and have a blast! Happy decorating!
- Anne Yorks, owner The Flour Box
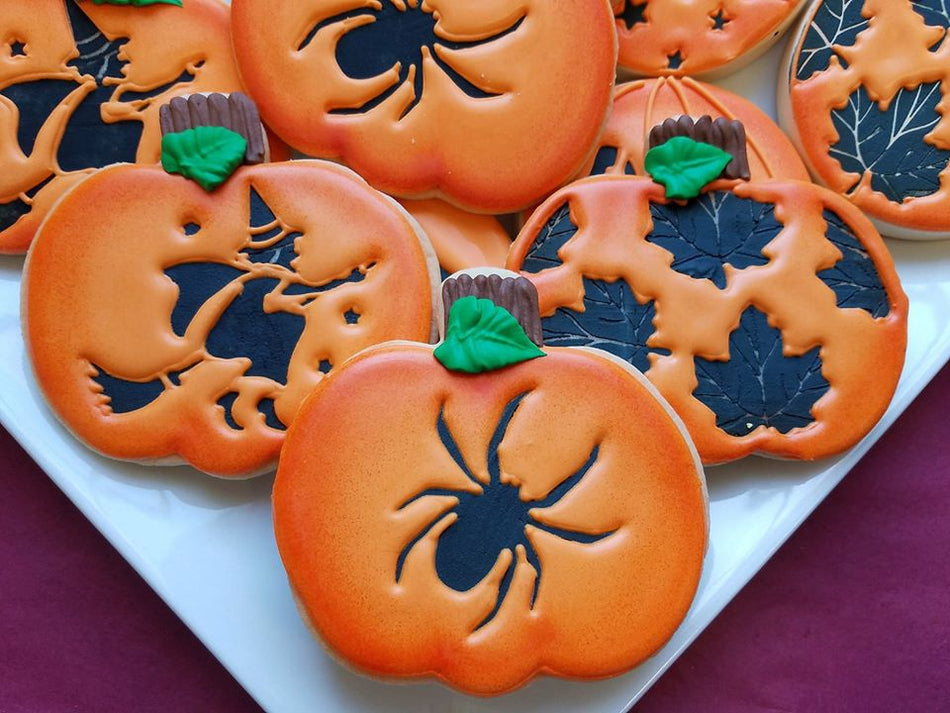
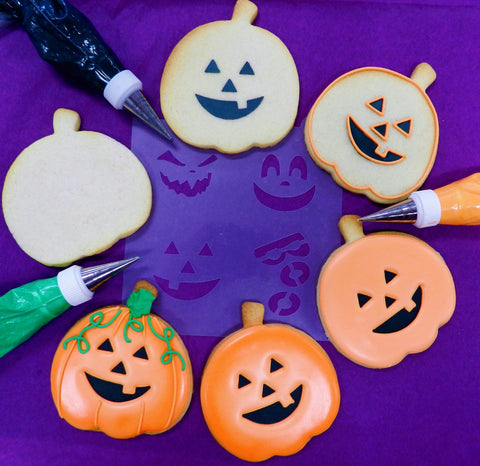
Stencil FIRST to easily create stunning pumpkins. The stencil is quick and will make your cookies look perfect each time. Add a pop of airbrush to bring the drama!
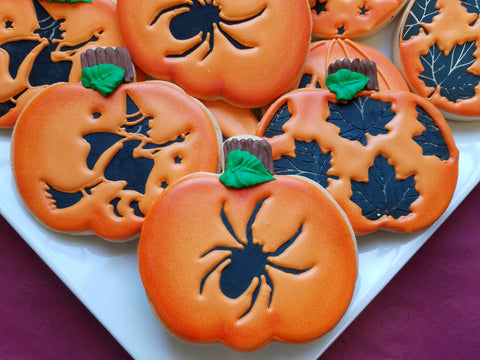
This technique is so cool because it kinda looks like the pumpkin is actually carved.
Here's a close-up...

It's pretty neat (and easy to make these). The trick is just to stencil FIRST before flooding the cookie.
Be sure to match your cutter up to the stencil before you get started.

See how the spider fits better on the 4" pumpkin (on the left). But, the Jack-o-Lantern face fits better on the 3" pumpkin cutter.
Plus, silhouette stencils (like the spider, witch, faces) seem to work better. They have big solid areas to pipe around.
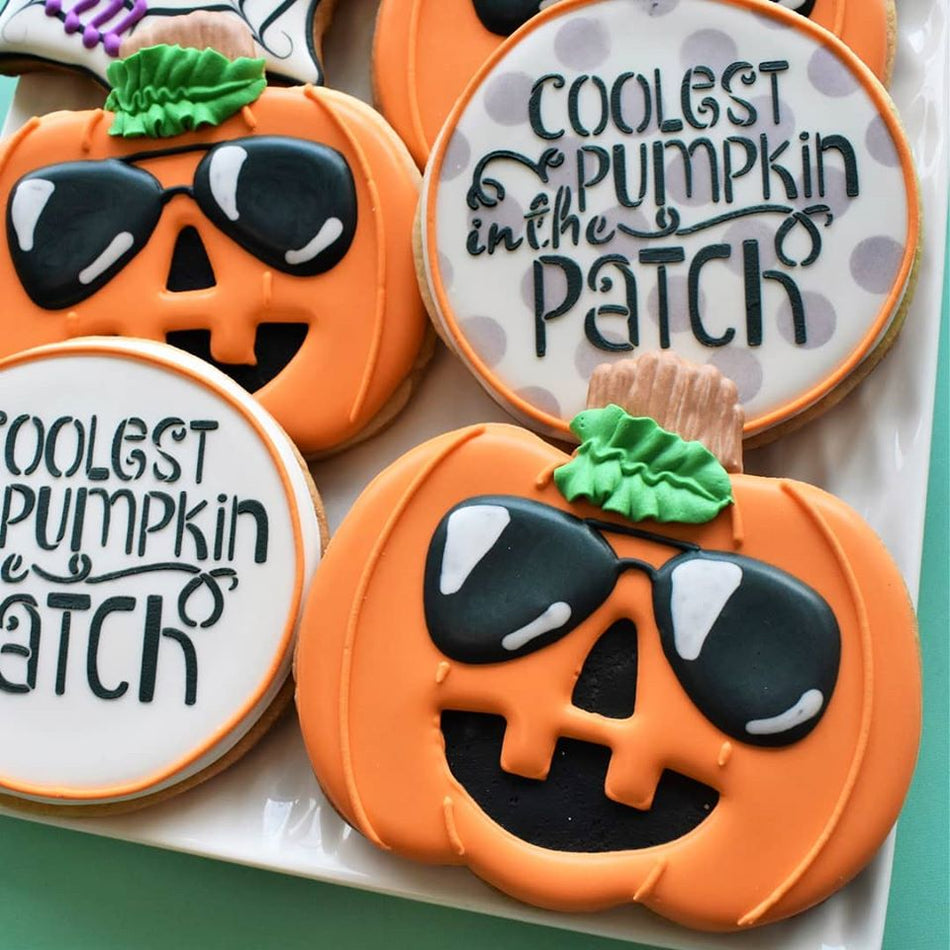
Here's another look at this same concept with the Jack-o-lantern faces:
I hope you'll give this technique a try! If you do, tag or share photos...I'd love to see your twist on it!
Happy Decorating,
Anne