Thanksgiving Cookie Decorating Kit

Thanksgiving Cookie Decorating Kit
$33.79$20.27On sale!
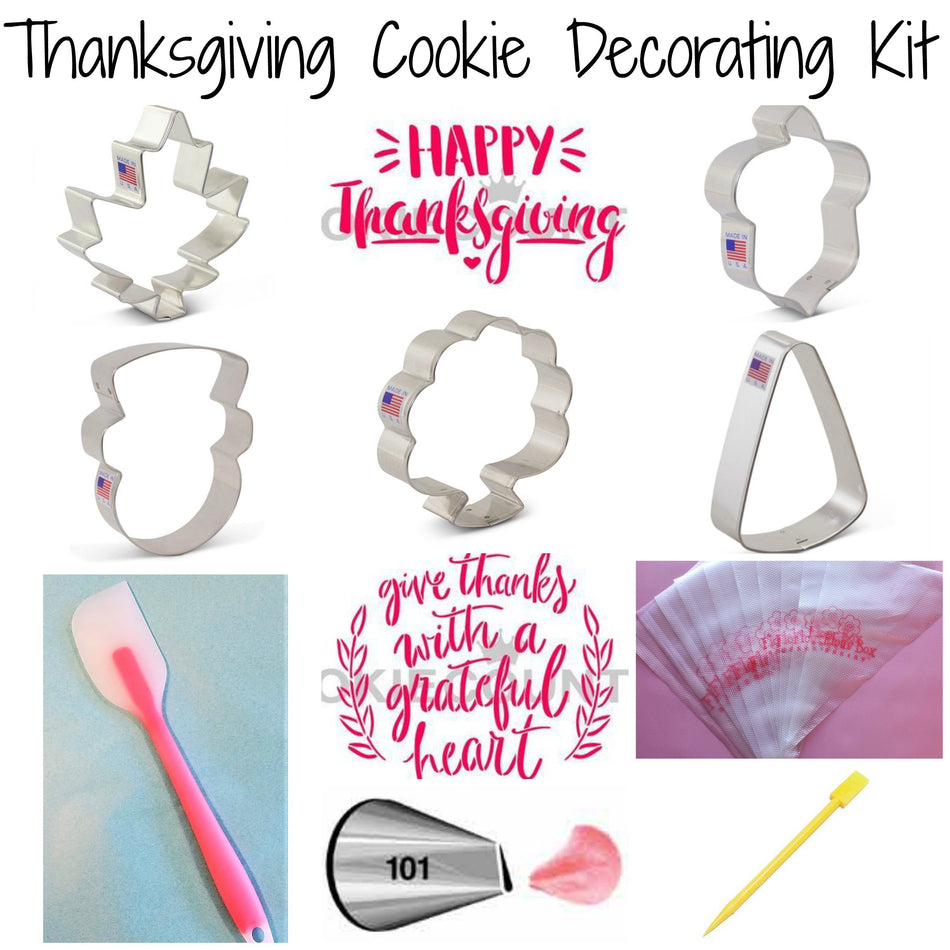
What's included?
Here's a list of everything that's part of the kit - all with a 10% savings when purchased together!
- Tipless Icing Bags SAMPLE 10-Pack
- Snowman Face Cookie Cutter by The Flour Box
- Candy Corn Cookie Cutter
- Pink Flour Box Silicone Spatula
- Wilton Tip #101 Petal
- Give Thanks with Grateful Heart Stencil
- Maple Leaf Cookie Cutter
- Happy Thanksgiving Fun Font Stencil
Don't need all of these items?
No worries! You can buy just the items you want!
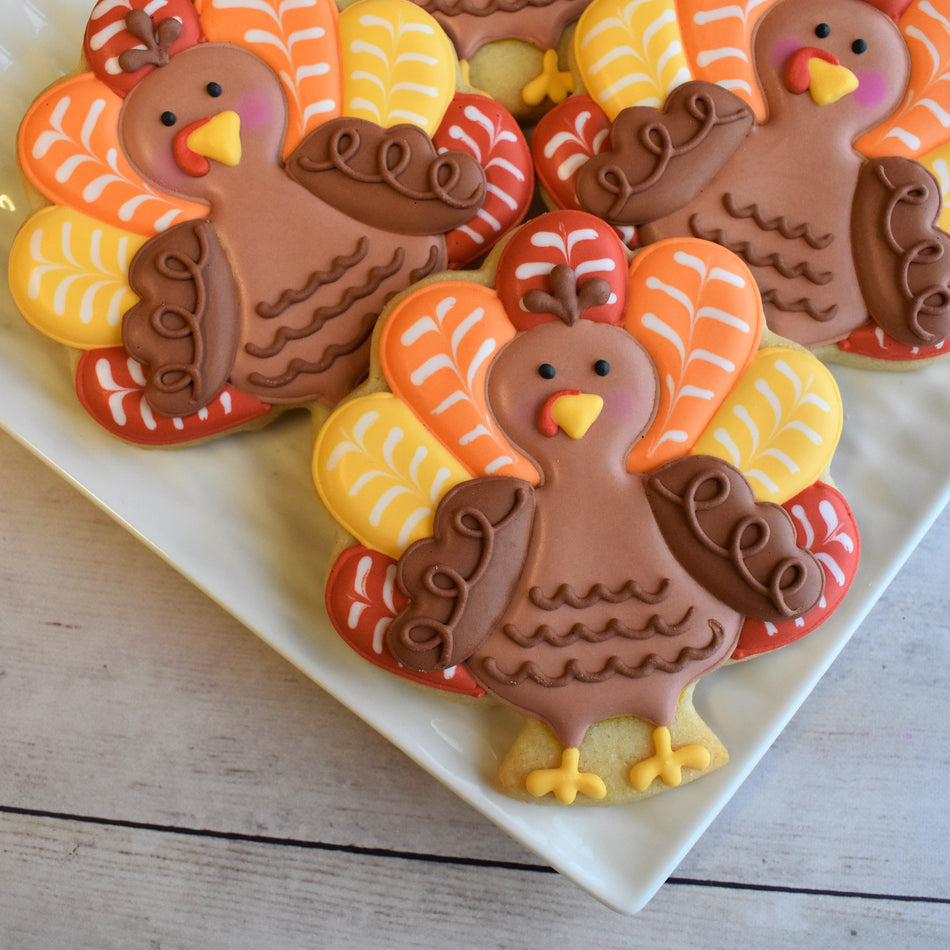
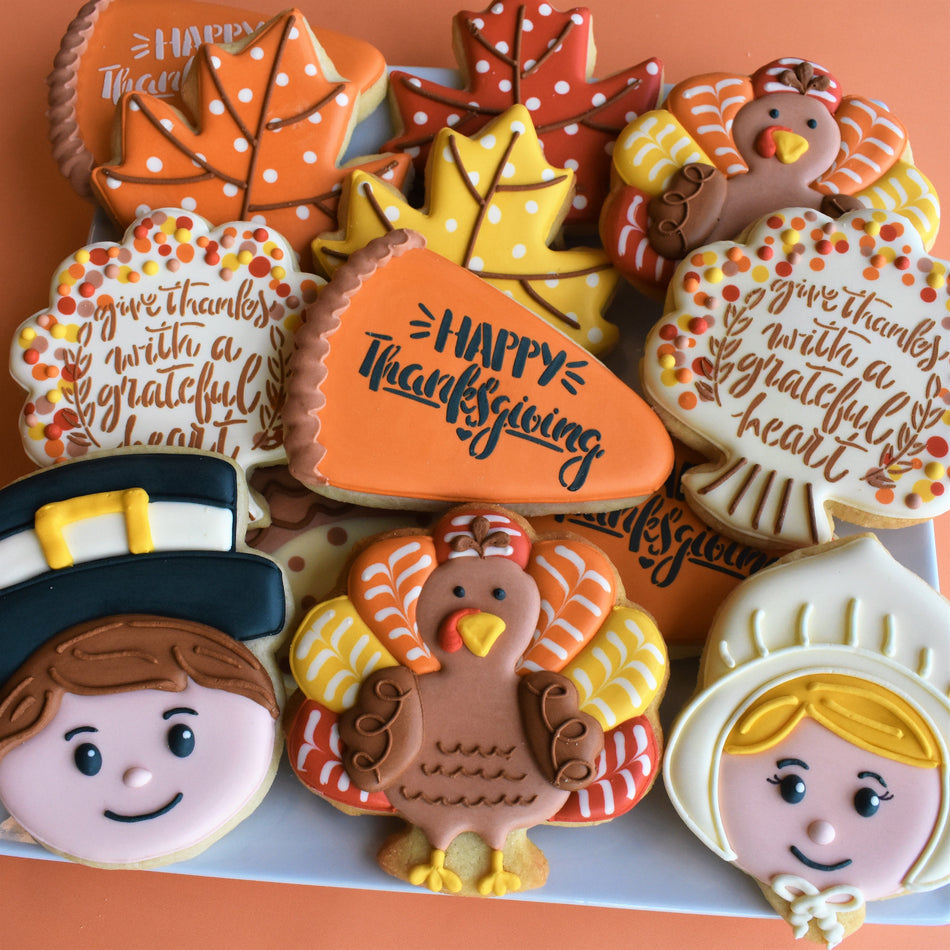
Pick what I needGratitude is such a big part of my life and I think that is why I love Thanksgiving so much! I love the food, my family, and of course I love making Thanksgiving cookies! In today's tutorial, I'm going to show you how to make turkeys, pilgrims, pie slices, trees and leaves - OH MY!! Grab the decorating kit for the essential cutters and stencils to recreate these tasty masterpieces!
Getting Started

Check out the video tutorial - a step-by-step guide to making these cookies!
Cookie Yield
For a single batch of dough I was able to make 20 of these cookies, 5 pilgrim/snowman faces, 3 maple leaves, 4 turkeys/trees, 4 pie slices/candy corn, and 4 acorn/pilgrim. I should note that I roll my cookies to 1/4" thick using the Dough EZ Rolling Mat System. The thickness of your cookies will impact your yield.

COOKIE RECIPE: For a cookie recipe and rolling and baking video CLICK HERE - this recipe can be doubled in a KitchenAid Mixer.
Prepping the Royal Icing
ICING PREP
For a single batch of dough, I typically use a single batch of icing. Since I'm using a KitchenAid mixer, I made a double batch of icing (about 36 oz of icing) and split it in half (reserving half for another project).

A total of 18 oz of icing. I don't measure exactly...I estimate. For a more detailed look at icing planning, CLICK HERE to read this helpful blog post.
ROYAL ICING RECIPE
For a royal icing recipe and video CLICK HERE - this recipe can be doubled in a KitchenAid Mixer.

ICING COLORS
On this project I used ChefMaster food gels. I use the color straight from the bottle to make my icing colors. For this project I used fleshtone, buckeye brown, sunset orange, gold, tulip red, and coal black. I use the gold to make both the deeper gold color and the lighter ivory color. The buckeye brown made both the light and dark shades of that color. To make the pumpkin color I used mostly sunset orange, but added 2 dots of buckeye brown to give it a ruddy tone. Tulip Red (no taste red) has tones of orange undertones and makes the PERFECT fall red. It is VERY helpful to make colors like black the day before you decorate (see my schedule below). You will add less gel and the color will deepen over night. CLICK HERE to check out all the food gel options in our shop.
Templates
With this tutorial, I'm providing several templates. You can download a file for both the boy and girl pilgrim to use with your projector (or cut and trace lines on the cookies). I have also provided the turkey wing transfer sheet, the turkey body (good for tracking) and the full turkey template (good for your projector). CLICK HERE - to download the .zip file will all the images.

Project Timeline
DAY 1: PREP COOKIES AND ICING
Mix Dough (30 mins), Chill Dough (2 hours inactive time), Roll and Bake (1 hour), Mix Royal Icing and Prep Icing Colors - it is helpful to make the colors (especially black and navy) the day before you decorate because the color will deepen overnight (1 hour)
DAY 2: DECORATE
Outline and Flood Cookies (1-2 hours), Allow to dry in front of fan before adding details (1 hour for standard cookies, but allow 6 hours of dry time on the cookie stenciled with royal icing), Piping details, painting gold accents, and stenciling (1.5-2.5 hours)
**ALLOW COOKIES TO FULLY DRY 18-24 HOURS BEFORE PACKING. STORE IN A COOL OVEN OVER NIGHT.**
DAY 3: PACKING COOKIES
It usually takes about 30 minutes to heat seal 2 dozen cookies, but plan for an extra 15 minutes if you're adding ribbons to the package. For tips on packing cookies, CLICK HERE to check out this helpful blog post with links to my favorite packing and shipping materials.
I want to see what you make! So be sure to tag @theflourboxshop on Instagram and Facebook and use #theflourbox so I can see what you create!
Happy Decorating!
Anne