Back to School Cookie Decorating KIT
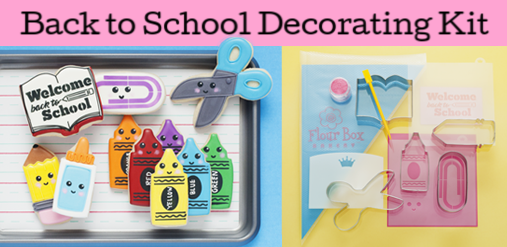
Back to School Cookie Decorating KIT
$36.06$21.64On sale!
What's included?
Here's a list of everything that's part of the kit - all with a 10% savings when purchased together!
- Crayon Cookie Cutter
- Pencil Cookie Cutter
- Pill Cookie Cutter
- Scissors Cookie Cutter
- Carnation Pink Crystal Color Mini
- Royal Icing Single (1) Scraper Tool
- School Supplies Stencil by The Flour Box
- Welcome Back to School Stencil by The Flour Box
- Tipless Icing Bags SAMPLE 10-Pack
Don't need all of these items?
No worries! You can buy just the items you want!
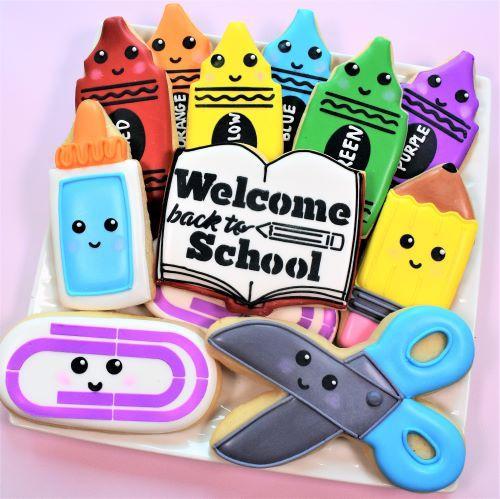
Pick what I needLet's face it, the best part of Back to School is shopping for School Supplies. So today I am celebrating Back to School by making a happy bunch of school tools and a Welcome Back Book Cookie! This tutorial features two Flour Box exclusive stencils that are really going to speed things up!
This new tutorial is also paired with a Back to School Cookie Decorating Kit. It has the essential cutters and stencils needed to make these cookies. I LOVE making B2S cookies, so be sure to scroll down to see lots of SCHOOL inspiration!

Before we get to the tutorial, can I share some really BIG, EXCITING news!!! We have partnered with The Cookie Countess to create our own line of stencils. And, they are featured in this kit!!!!!! You can also pick them up individually, too!
Drum roll, please. Now Introducing...
Welcome Back to School stencil


I am totally doing a happy dance over these!! Definitely check out the video to see how to use these stencils!
Now it's time to learn how to make these cookies! Check out the video to see SIX different Back to School cookies!
PREPPING THE COOKIES and YIELD:

COOKIE YIELD: The crayon and pencil are not big cutters, so my yield was a little higher for this set. For a single batch of dough I was able to make 24 of these cookies, 3 of each! I should note that I roll my cookies to 1/4" thick using the Dough EZ Rolling Mat System. The thickness of your cookies will impact your yield.
COOKIE RECIPE: For a cookie recipe and rolling and baking video CLICK HERE - this recipe can be doubled in a KitchenAid Mixer.
TEMPLATES:
I did not use templates in the video, but I'm providing templates for the pencil, scissors, and glue bottle in case it is helpful - ENJOY! Using a template can help guide the cookie design and build confidence when decorating. You can use them with a projector or print and cut them out to trace lines (with a food safe marker) on the cookie surface. Although, sometimes it is quicker to decorate freehand, especially with these pretty straight forward cookies.
Download the zip file for the templates - CLICK HERE

CUTTERS
(click on photo to view the school cutter collection): This set features the crayon (also the glue bottle), pencil, scissors, book, and pill (paperclip).

They are also available as a set with the stencils in the Back to School Cookie Decorating Kit - Click here to view in shop!
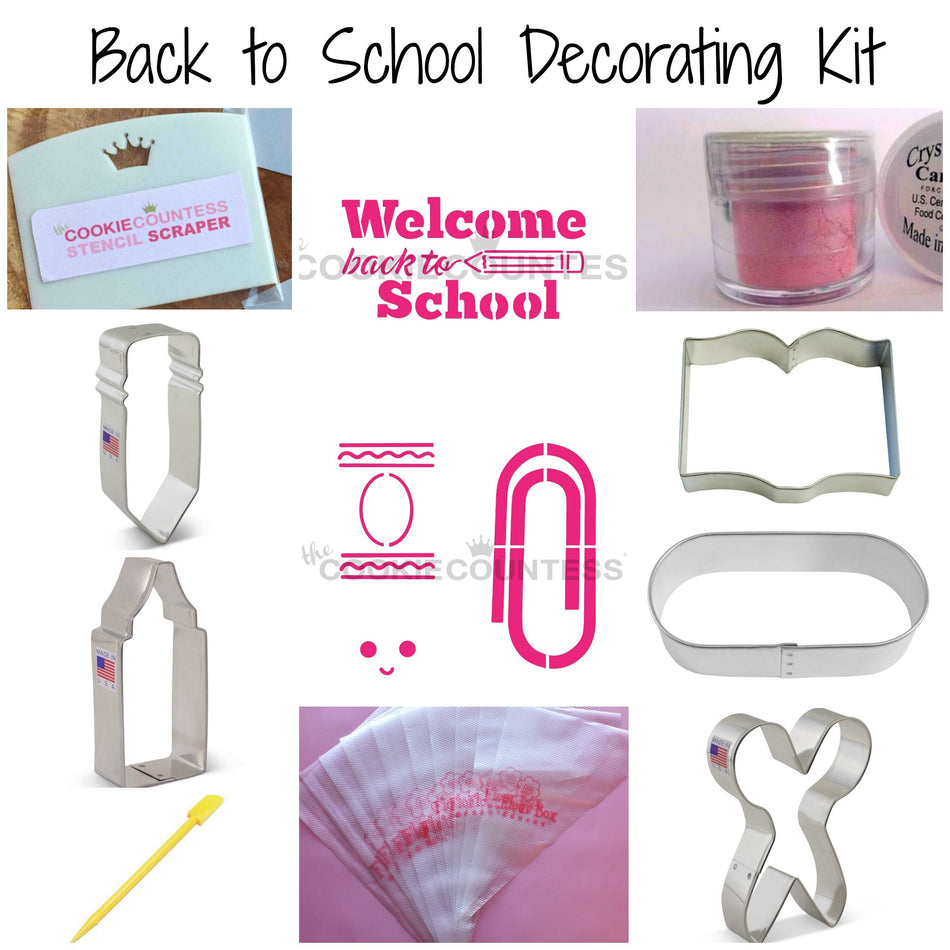
There are so many cutters, stencils and tools in this box! This kit includes: FIVE cutters (Crayon, Pencil, Scissors, Book, and Pill/Paperclip), Welcome Back to School Stencil, School Tools Stencil, Single Scraper pack, 1/4 oz Carnation Pink Crystal Color, Boo Boo Stick, 10 Tipless Bags (5 10" and 5 13")! (**kit does not include standard decorating supplies like ingredients, food safe brush, standard tips like #1 or #2, or food gels. These need to be purchased separately.)

This kit is $24.99. Here's another view of the contents of the kit:

SPECIALITY TOOLS:
Also featured in the tutorial (and the baby cookie decorating kit) is one royal icing scraper. You can't have too many of these!
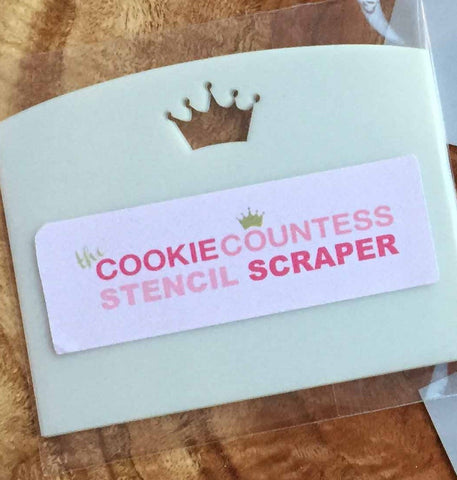
This tool is ESSENTIAL for stenciling with royal icing. Here are few tips for stenciling with royal icing:

PREPPING THE ROYAL ICING:
ICING PREP: For a single batch of dough, I typically use a single batch of icing. Since I'm using a KitchenAid mixer, I made a double batch of icing (about 36 oz of icing) and split it in half (reserving half for another project).
I typically like to stick to five icing colors, but not for this set. I wanted to create a rainbow of crayons, so I cracked out my small mixing bowls to help keep icing proportioned.

Each of these little storage containers hold 2 oz of icing. I made 2 oz of the Super Red, Sunset Orange, Lemon Yellow, Leaf Green, Sky Blue, and Purple. Then I also make an ounce or two of light pink and brown for the pencil. I made these colors in a 20-sec icing consistency. Plus, I needed and ounce of stiff black and 3-4 ounces of white. Because I'm making more colors, I used more ounces...a total of 19 or 20 oz of icing. I don't measure exactly...I estimate. For a more detailed look at icing planning, CLICK HERE to read this helpful blog post.
ROYAL ICING RECIPE: For a royal icing recipe and video CLICK HERE - this recipe can be doubled in a KitchenAid Mixer.

ICING COLORS: On this project I used ChefMaster food gels: Bright White, Deep Pink (but only a dot for the pink eraser on the pencil), Super Red, Sunset Orange, Lemon Yellow, Leaf Green, Sky Blue, Purple, Buckeye Brown, and Diamond Black. CLICK HERE to check out all the food gel options in our shop.
PLANNING YOUR PROJECT TIMELINE:
(You'll have more fun decorating cookies if you plan ahead and break up the project. It just fits better in my life than tackling everything in one day. Times based on a single batch of cookies, increase as needed):
Day 1 PREP COOKIES AND ICING: Mix Dough (30 mins), Chill Dough (2 hours inactive time), Roll and Bake (1 hour), Mix Royal Icing and Prep Icing Colors - it is helpful to make the colors the day before you decorate because the color will deepen overnight (1 hour)
Day 2 DECORATE: Outline and Flood Cookies (1-2 hours), Allow to dry in front of fan before adding details (1 hour for standard cookies, but allow 6 hours of dry time on the cookies stenciled with royal icing), Piping details, airbrushing, and stenciling (1.5-2.5 hours)
**ALLOW COOKIES TO FULLY DRY 18-24 HOURS BEFORE PACKING. STORE IN A COOL OVEN OVER NIGHT.**
Day 3 PACKING COOKIES: For tips on packing cookies, CLICK HERE to check out this helpful blog post with links to my favorite packing and shipping materials.
I find that 2 cookies fit perfectly in the BRP Box Shop 7" window box! A perfect treat for teachers on the first day of school!

MATERIALS LIST:
Back to School Cookie Decorating Kit: Pick up the stencil and cutters and essential tools as one kit. Regularly $27.86, but save 10% when purchased as a bundle for $24.99. CLICK HERE to view in shop.
DECORATING TOOLS:
- Cutters (see above)
- Welcome Back to School Stencil (see above)
- Mini Blooms Stencil (see above)
- Food Gel Colors
- PME Scribe
- Tipless Decorating Bags
- #2 PME Tip (for outlines and details)
- #1 PME Tip (for piping small details on book and works on crayon)
- Scraper
More Inspiration!
Want to see a few other Back to School cookie ideas for inspiration?
This nerdy apple is one of my favorites! You can find the cutter and stencil in our shop as a bundle - CLICK HERE.

More crayons and apples!

More school tools!

I hope you enjoyed this tutorial!

I want to see what you make! So be sure to tag @Flourboxbakery on Instagram and Facebook and use #flourboxbakery so I can see what you create!
Happy Decorating!
Anne