Wedding Cookie Decorating KIT
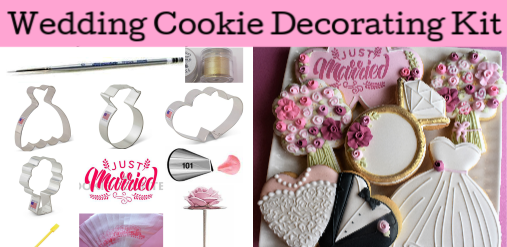
Wedding Cookie Decorating KIT
$33.80$20.28On sale!
What's included?
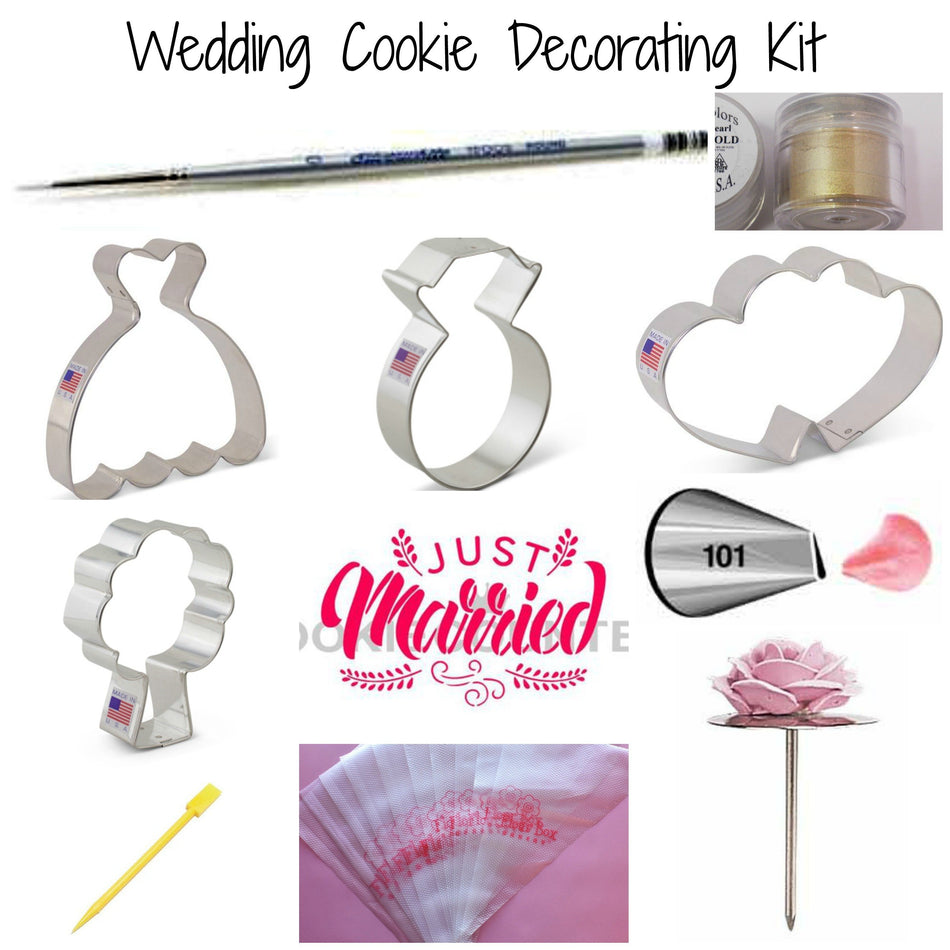
Here's a list of everything that's part of the kit - all with a 10% savings when purchased together!
- Apple Tree Cookie Cutter
- Wilton Tip #101 Petal
- Silverwhite Brush Size 00000
- Antique Gold Crystal Color Mini
- Flower Nail Tool
- Just Married Stencil
- Tipless Icing Bags SAMPLE 10-Pack
Don't need all of these items?
No worries! You can buy just the items you want!
Pick what I needGetting Started
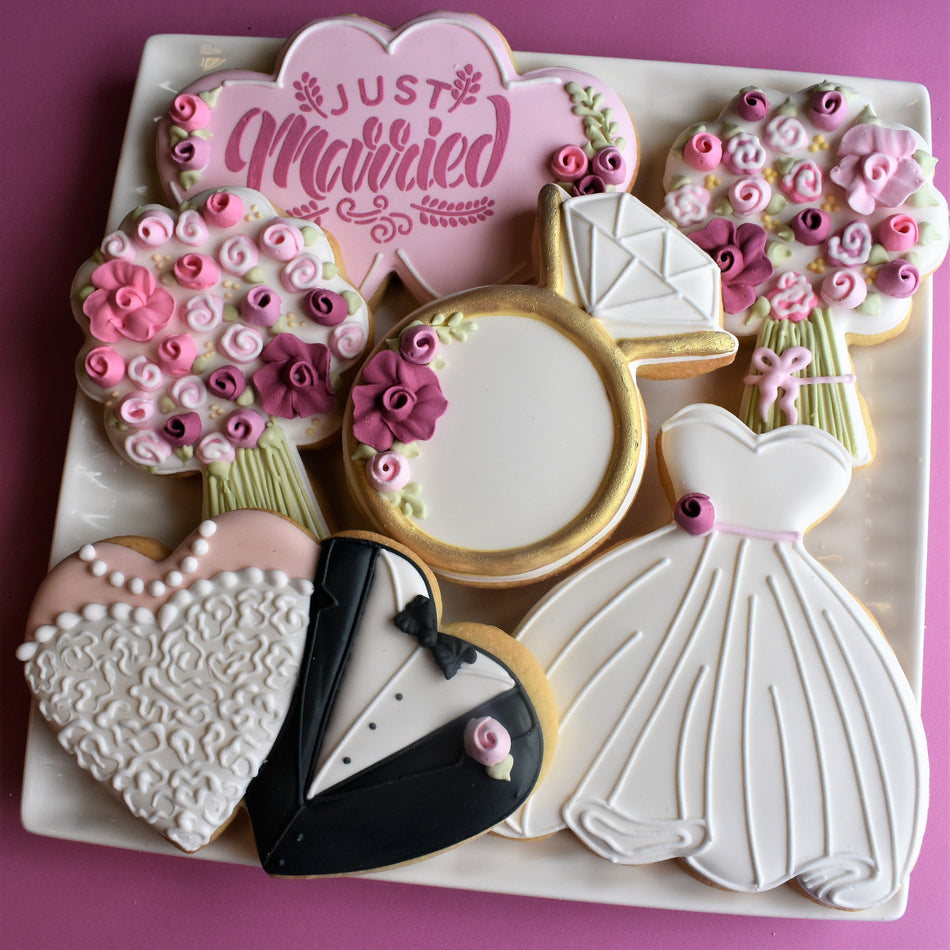
In this tutorial, I will show you how to make five wedding cookies: a Wedding Gown with piped details that look like beautiful folds of fabric, a Diamond Ring embellished with gold accents and a cluster of roses, a beautiful Flower Bouquet (using an apple tree cookie cutter!), a Bride and Groom cookie, and a stenciled Just Married cookie - both using the double heart cookie cutter! Take a look at the video and then check below for additional tips on how to make these cookies!
I truly loved making wedding cookies! Whether it's a bridal shower, bachelorette party, or even the big day itself, cookies are always a sweet way to add to the celebration!

Cookie Yield
For a single batch of dough I was able to make 15 of these cookies, 3 each of the bouquet, ring, dress and 5 double hearts (2 Just Married and 3 Bride and Groom). I should note that I roll my cookies to 1/4" thick using the Dough EZ Rolling Mat System. The thickness of your cookies will impact your yield.
COOKIE RECIPE: For a cookie recipe and rolling and baking video CLICK HERE - this recipe can be doubled in a KitchenAid Mixer.
Prepping the Royal Icing
ICING PREP
For a single batch of dough, I typically use a single batch of icing. Since I'm using a KitchenAid mixer, I made a double batch of icing (about 36 oz of icing) and split it in half (reserving half for another project).
I used mostly white and bakers rose for this project. I portioned 6 oz of white and 4 oz of bakers rose. Then I used 3 oz of black, 3 oz of gold, 1 oz of avocado, and 1 oz of burgundy. A total of 18 oz of icing. I don't measure exactly...I estimate. For a more detailed look at icing planning, CLICK HERE to read this helpful blog post.
ROYAL ICING RECIPE
For a royal icing recipe and video CLICK HERE - this recipe can be doubled in a KitchenAid Mixer.

ICING COLORS
On this project I used ChefMaster food gels: Bright White, Diamond Black, Avocado, Gold, Burgundy, Bakers Rose, and Black Diamond. It is VERY helpful to make colors like black the day before you decorate (see my schedule below). You will add less gel and the color will deepen over night. CLICK HERE to check out all the food gel options in our shop.
Project Timeline
Day 1: Prep Cookies and Icing
Mix Dough (30 mins), Chill Dough (2 hours inactive time), Roll and Bake (1 hour), Mix Royal Icing and Prep Icing Colors - it is helpful to make the colors (especially black and navy) the day before you decorate because the color will deepen overnight (1 hour)
** Make Roses - (optional) on Day 1 (45-60 minutes for 75 roses). After you make your icing, make the roses so they can dry overnight. Store extras in a small tupperware. I used the bakers rose icing and the burgundy in a light and dark shade.

Day 2: Decorate
Outline and Flood Cookies (1-2 hours), Allow to dry in front of fan before adding details (1 hour for standard cookies, but allow 6 hours of dry time on the cookie stenciled with royal icing), Piping details, painting gold accents, and stenciling (1.5-2.5 hours)
**ALLOW COOKIES TO FULLY DRY 18-24 HOURS BEFORE PACKING. STORE IN A COOL OVEN OVER NIGHT.**
Day 3: Packing Cookies
It usually takes about 30 minutes to heat seal 2 dozen cookies, but plan for an extra 15 minutes if you're adding ribbons to the package. For tips on packing cookies, CLICK HERE to check out this helpful blog post with links to my favorite packing and shipping materials.

I want to see what you make! So be sure to tag @Flourboxbakery on Instagram and Facebook and use #flourboxbakery so I can see what you create!
Happy Decorating!
Anne