Pumpkin Patch Cookie Decorating Kit


Pumpkin Patch Cookie Decorating Kit
$35.84$21.50On sale!
What's included?
Here's a list of everything that's part of the kit - all with a 10% savings when purchased together!
- Tipless Icing Bags SAMPLE 10-Pack
- Buffalo Plaid Mini Stencil
- Wilton Tip #349 Leaf
- Wilton Tip #67 Leaf
- Pumpkin Tall Cookie Cutter
- Sunflower NEW Cookie Cutter
- Truck With Pumpkin Cookie Cutter
- Pumpkin Stack Cookie Cutter
- Hello Fall Cookie Countess Stencil
- Tulip/Rose Cookie Cutter
- Chocolate Jimmie Sprinkle
Don't need all of these items?
No worries! You can buy just the items you want!
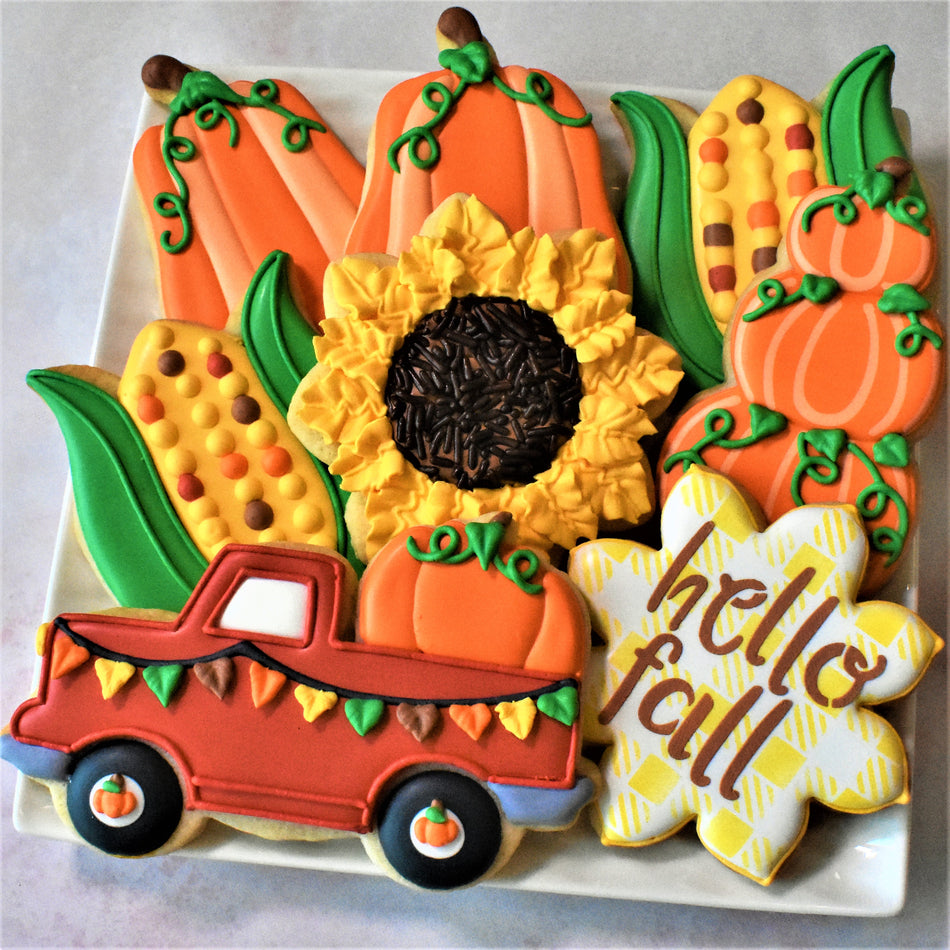
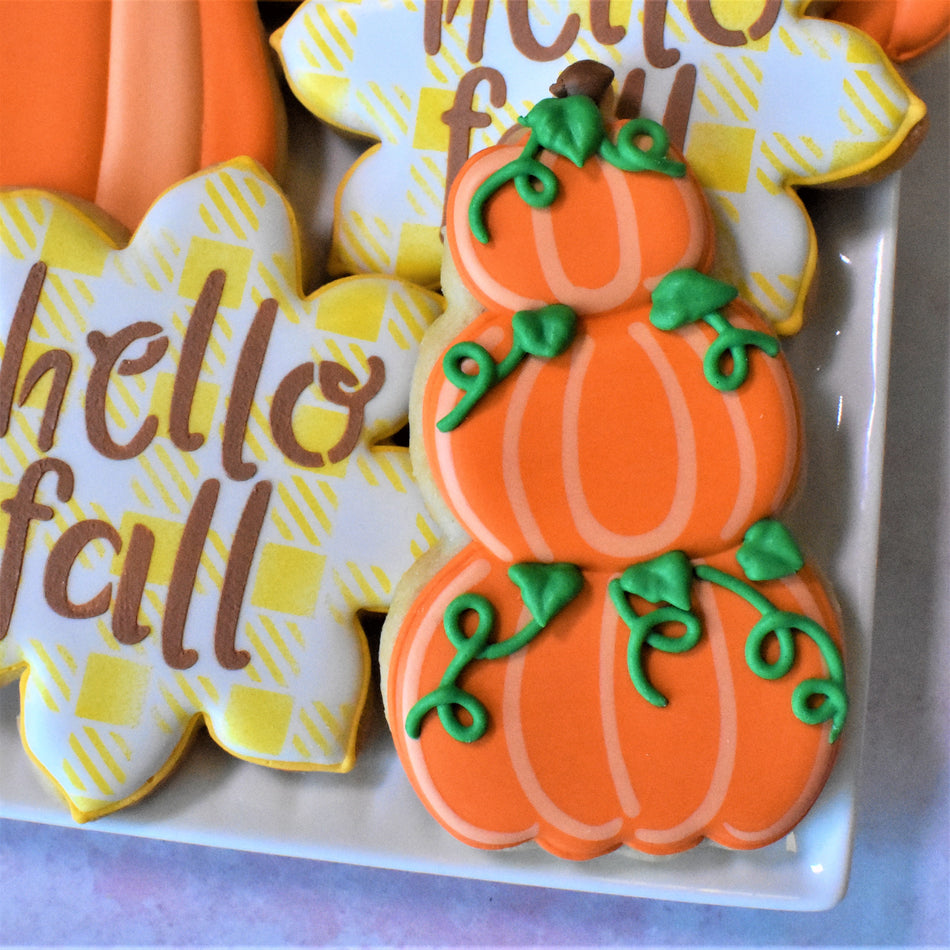
Pick what I needAn annual trip to the pumpkin patch is a fall family tradition. We wear our puffer vests and leather boots. With a latte in hand, we stomp through the hills to find the perfect pumpkin.

This tutorial includes all my favorite things from the patch: the pumpkin truck, sunflowers, corn cobs, and of course pumpkins!! Add in some buffalo plaid, and this set is ready to say 'Hello Fall'!
Cookie Yield
For a single batch of dough, you can make about 18-22 of these cookies. I should note that I roll my cookies to 1/4" thick using the Dough EZ Rolling Mat System. The thickness of your cookies will impact your yield.

COOKIE RECIPE: For a cookie recipe and rolling and baking video CLICK HERE - this recipe can be doubled in a KitchenAid Mixer.
Prepping the Royal Icing
ICING PREP
For a single batch of dough, I typically use a single batch of icing. Since I'm using a KitchenAid mixer, I made a double batch of icing and split it in half (reserving half for another project).
This cookie set has 8 icing colors. l don't measure exactly...I estimate. For a more detailed look at icing planning, CLICK HERE to read this helpful blog post.

ICING PLAN BY THE OUNCE (this is based on making 3 of each of these 6 cookie designs - 18 cookies)
Sunset Orange - 4 oz (pipe and flood)
Pastel Sunset Orange - 1 oz (flood only)
Tulip Red - 3 oz (pipe and flood)
Buckeye Brown - 2 oz (pipe and flood)
Golden Yellow - 3 oz (pipe and flood)
Leaf Green - 2 oz (pipe and flood)
Bright White - 2 oz (flood only)
Black Diamond- 1 oz (20-second icing)
Gray (black + white) - 1 oz (20-second icing)
ROYAL ICING RECIPE
For a royal icing recipe and video CLICK HERE - this recipe can be doubled in a KitchenAid Mixer.
Project Timeline
Plan ahead to enjoy the most success with your cookie project! I break up the decorating process. It works better with my life to do a little each day. Here is the schedule for this cookie project and estimated times on how long each phase takes.
DAY 1
Mix Dough (30 mins), Chill Dough (2 hours inactive time), Roll and Bake (1 hour), Mix Royal Icing and Prep Icing Colors - it is helpful to make the colors the day before you decorate because the color will deepen overnight (1 hour).
DAY 2
Outline and Flood Cookies (1-2 hours), Allow to dry in front of fan before adding details (1 hour for standard cookies or 6 hours before stenciling with royal icing). Piping details and stenciling (1.5-2 hours)
**ALLOW COOKIES TO FULLY DRY 18-24 HOURS BEFORE PACKING. STORE IN A COOL OVEN OVER NIGHT.**
DAY 3
For tips on packing cookies, CLICK HERE to check out this helpful blog post with links to my favorite packing and shipping materials.
Recreate these!
Pick up the Kit! It's got the essential cutters and stencils and a few bonus tools!

I would be so flattered if you recreated these cookies! Be sure to tag @theflourboxshop or use hashtag #theflourbox so I can see what you create!

Happy Decorating!
Anne