Santa Claus Cookie Decorating Kit
Santa Claus Cookie Decorating Kit
$33.55$20.13On sale!
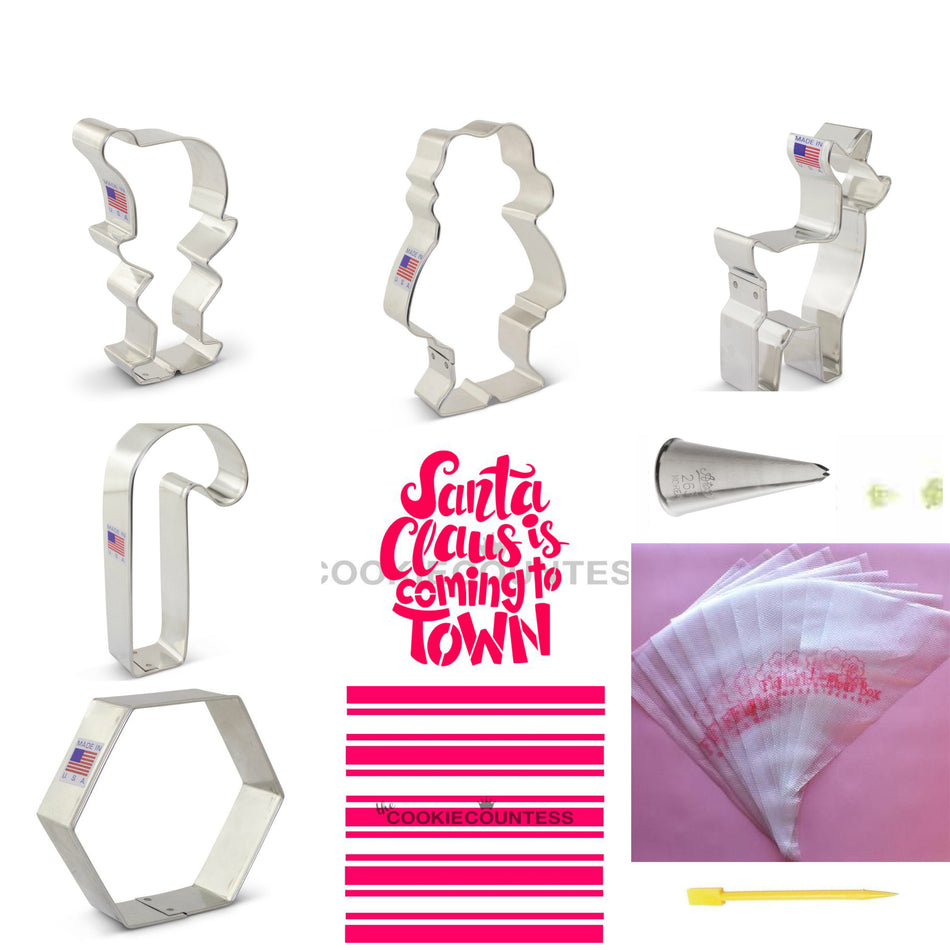
What's included?
Here's a list of everything that's part of the kit - all with a 10% savings when purchased together!
- Candy Cane [Large] Cookie Cutter
- Elf Cookie Cutter
- Hexagon Cookie Cutter
- Preppy Stripes Stencil
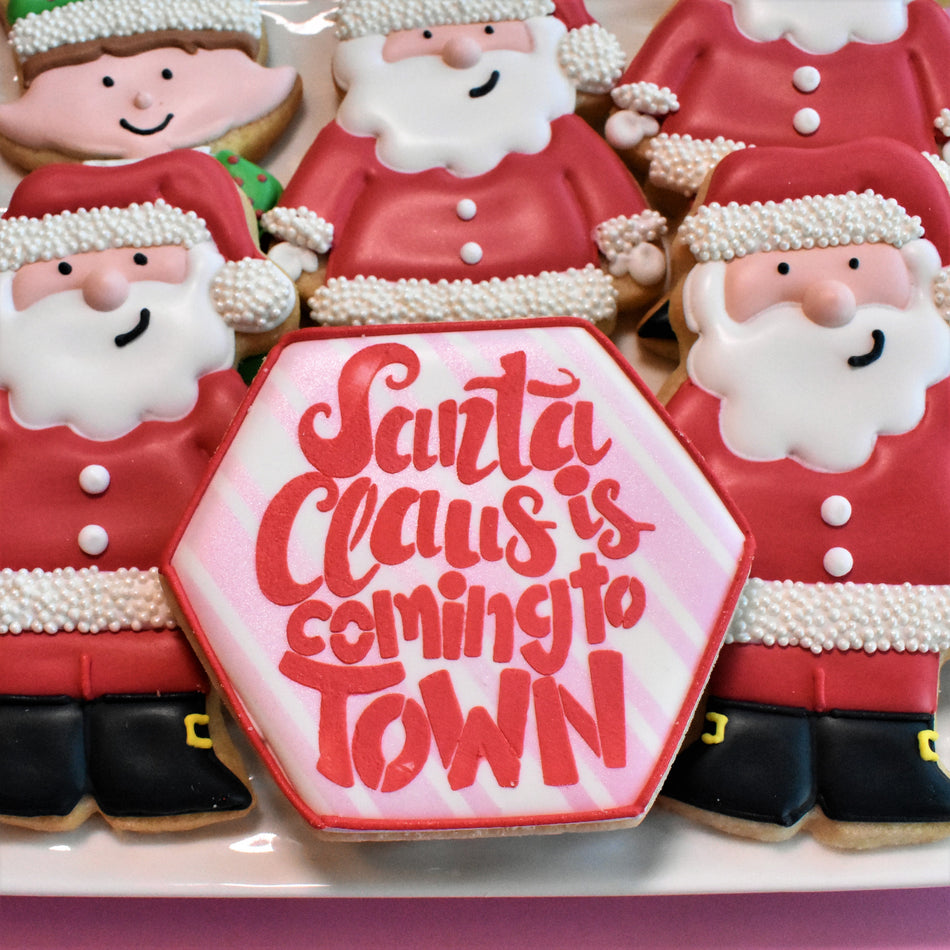
- Santa Claus is Coming to Town Stencil
- Ateco Tip #263 (similar to #65s) Small Leaf
- Tipless Icing Bags SAMPLE 10-Pack
Don't need all of these items?
No worries! You can buy just the items you want!
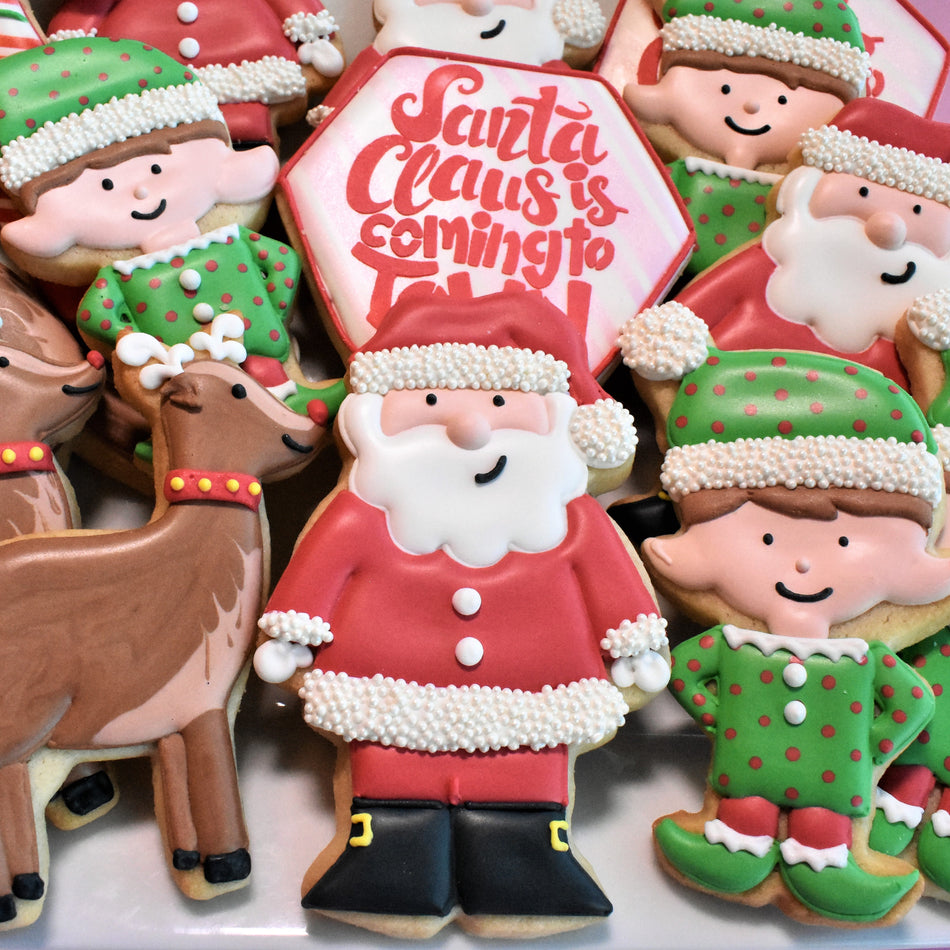
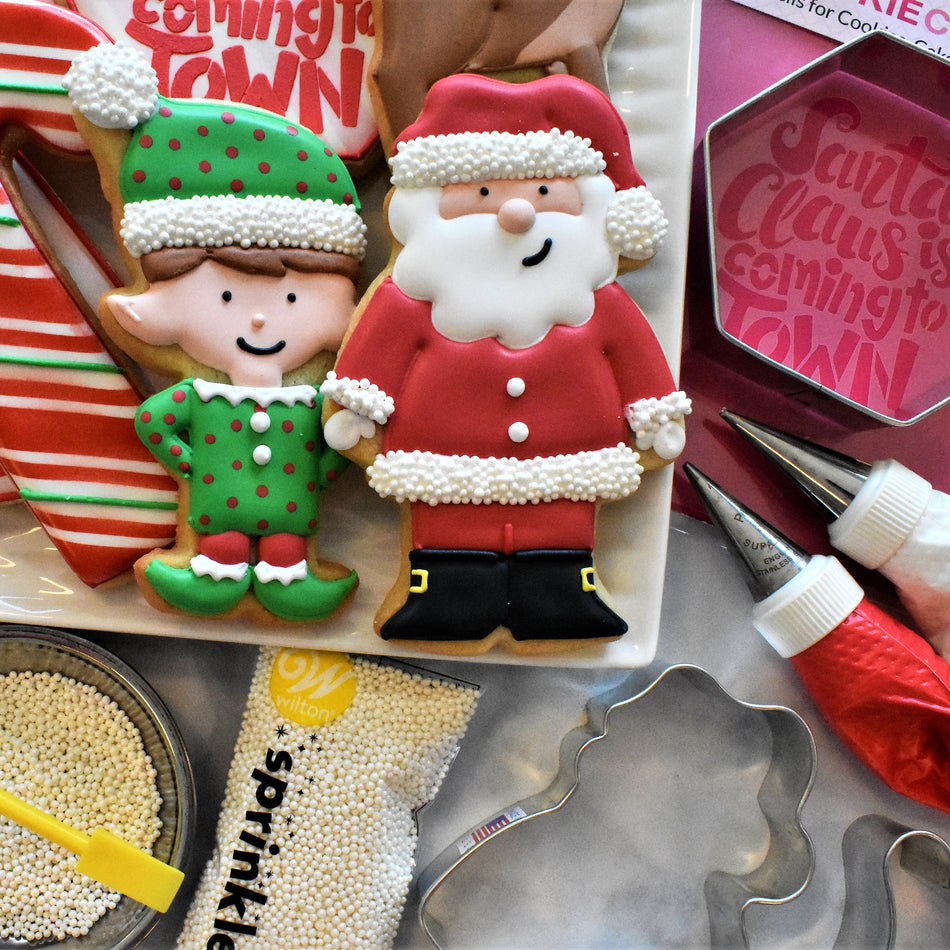
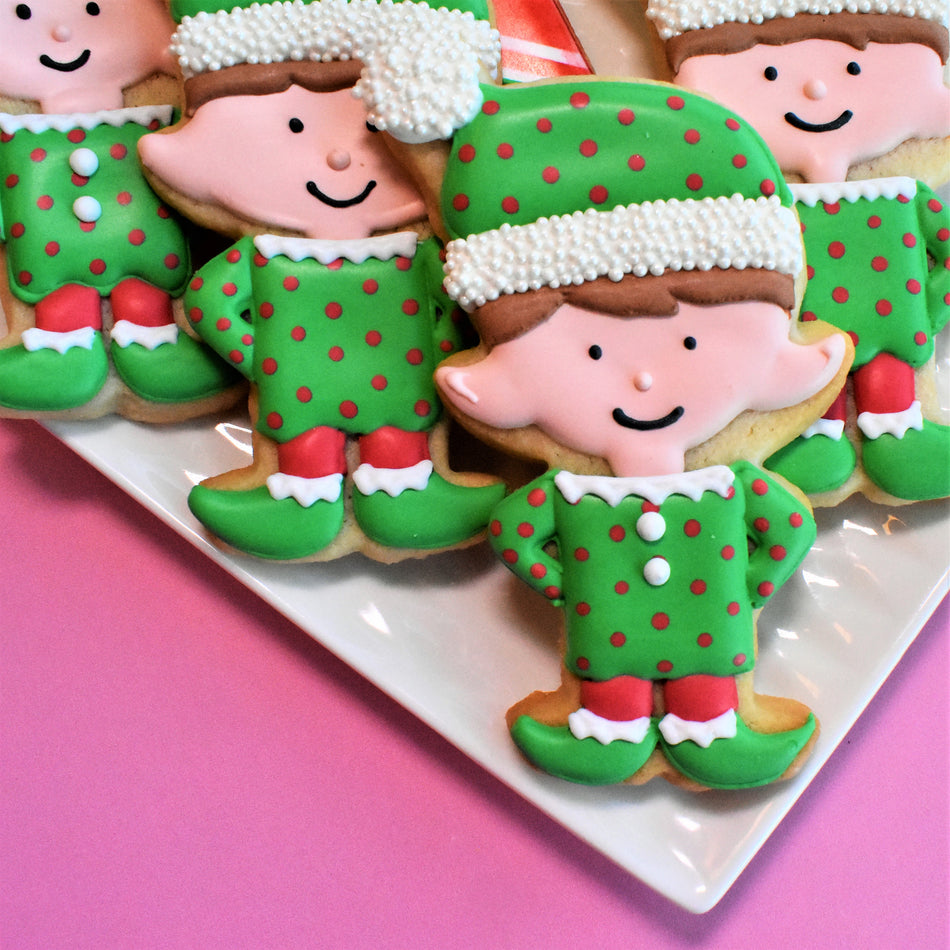
Pick what I needThe spirit of St. Nicolas or Santa Claus is one of my favorite parts of Christmas. I love thinking about the kindness and generosity people show each other during this season. To celebrate that spirit of loving and giving, I'm kicking off the 2019 holiday cookie season with a brand new Santa Cookie Decorating Tutorial and Kit! This kit features my newest cutter design - the Cute Santa - created with the team at the Ann Clark Cookie Cutter Co! I love this cutter because it's a great alternative to the Santa face...this full Santa is so fun to decorate right down to the buckles on his boots!

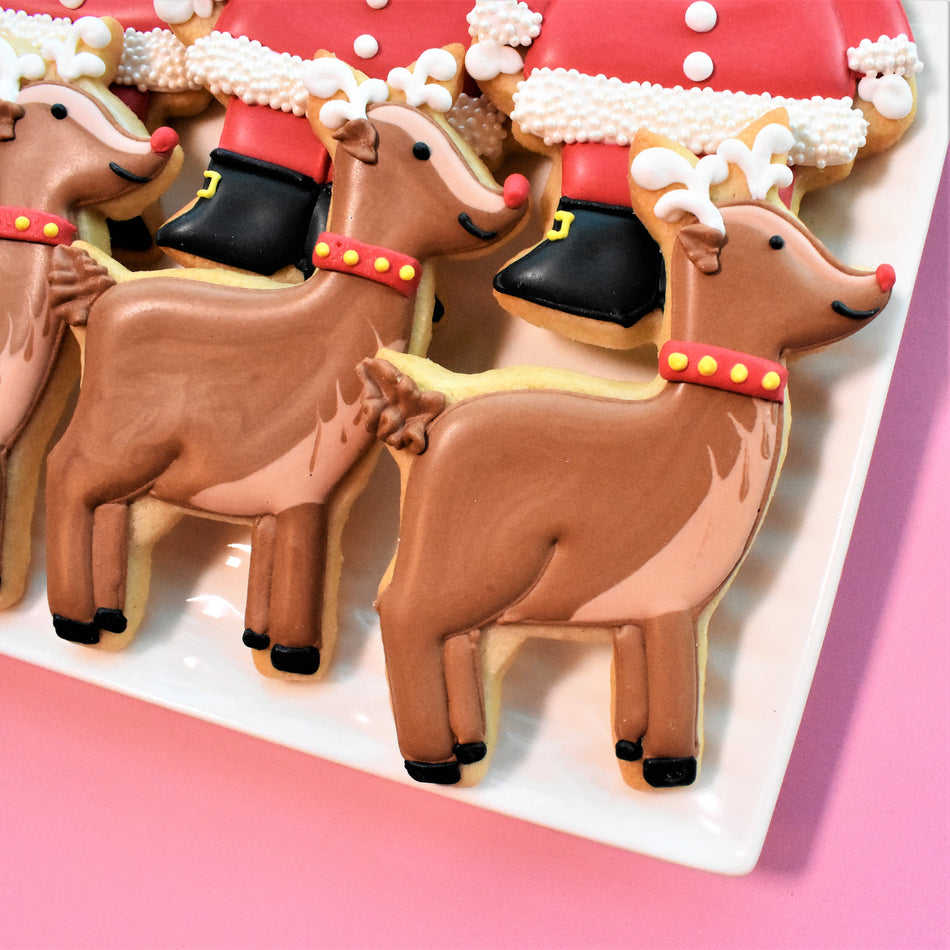
This video tutorial features 5 designs: Cute Santa, Elf (cutter designed by Karine of Le Monnier du Biscuit), Reindeer, Candy Cane, and Santa Claus is Coming to Town!
Cookie Yield
COOKIE YIELD:
These cookies are all in the 3’ – 4” size range. With a single batch of dough I made 19 cookies: 4 cute santas, 4 elves, 2 large candy cane, 4 hexagons, and 5 cute deer. I should note that I roll my cookies to 1/4" thick using the Dough EZ Rolling Mat System. The thickness of your cookies will impact your yield.

Even a single batch of cookies makes a really nice platter! But double it up if you have a cookie exchange in your future!

COOKIE RECIPE:
For a cookie recipe and rolling and baking video CLICK HERE - this recipe can be doubled in a KitchenAid Mixer.
Prepping Royal Icing
I love the traditional Christmas icing colors. Here's a guide to this fun color palette.

Make your icing the day before to get a pretty Christmas red icing color. Remember, the icing always dries darker than it appears!

For a single batch of dough, I typically use a single batch of icing. Since I'm using a KitchenAid mixer, I made a double batch of icing (about 36 oz) and split it in half (reserving half, or 18-19 oz, for another project).
I don't measure exactly...I estimate. Here's what worked for me on this Santa project:
Icing Plan by the Ounce
Christmas Red - 3 oz for pipe and flood
White - 5 oz for pipe and flood
Black - 2 oz for pipe and flood
Skin - 1 oz for 20-sec icing
Green - 3 oz for pipe and flood
Brown & Tan (tan and buckeye brown) - 3 oz brown & 1 oz tan (flood only)
Yellow - 1 oz for piping accents
I even had a little leftover of each color, except white - I used all the white to the last drop!
For a more detailed look at icing planning, CLICK HERE to read this helpful blog post.
ROYAL ICING RECIPE
For a royal icing recipe and video CLICK HERE - this recipe can be doubled in a KitchenAid Mixer.
Project Timeline
I like to break up the decorating process to fit in my schedule - especially during the busy holiday season!. Because there are several phases to decorated cookies, it works better with my life to do a little each day. Here is the schedule for this cookie project and estimated times on how long each phase takes.
DAY 1
Mix Dough (30 mins), Chill Dough (2 hours inactive time), Roll and Bake (1 hour), Mix Royal Icing and Prep Icing Colors - it is helpful to make the colors the day before you decorate because the color will deepen overnight (1 hour).
DAY 2
Outline and Flood Cookies (1-2 hours), Allow to dry in front of fan before adding details (1 hour for standard cookies, but allow 6 hours of dry time on the cookies stenciled with royal icing like the hexagon), Piping details, and stenciling (1.5-2.5 hours) Consider dusting the airbrushed cookies lightly with cornstarch to prevent the cookie package from sticking to the color.
**ALLOW COOKIES TO FULLY DRY 18-24 HOURS BEFORE PACKING. STORE IN A COOL OVEN OVER NIGHT.**
DAY 3
For tips on packing cookies, CLICK HERE to check out this helpful blog post with links to my favorite packing and shipping materials.
Packaging Tips
You can present these cookies on a platter at your holiday party. These cookies also make great cookie sets for a cookie or gift exchange! You can fit 3-5 cookies (with some overlap) in the 9” BRP Box Shop window box. Find it in their shop - click here! Usually I wrap the cookies before boxing them to keep them fresh longer!

Recreate these!
I would be so flattered if you recreated these cookies! Be sure to tag @theflourboxshop or use hashtag #theflourbox so I can see what you create!
Happy Decorating!
Anne