Mother's Day Tea Cookie Decorating Kit


Mother's Day Tea Cookie Decorating Kit
$43.79$26.27On sale!
What's included?
Here's a list of everything that's part of the kit - all with a 10% savings when purchased together!
- Teapot Cookie Cutter
- Teacup Cookie Cutter
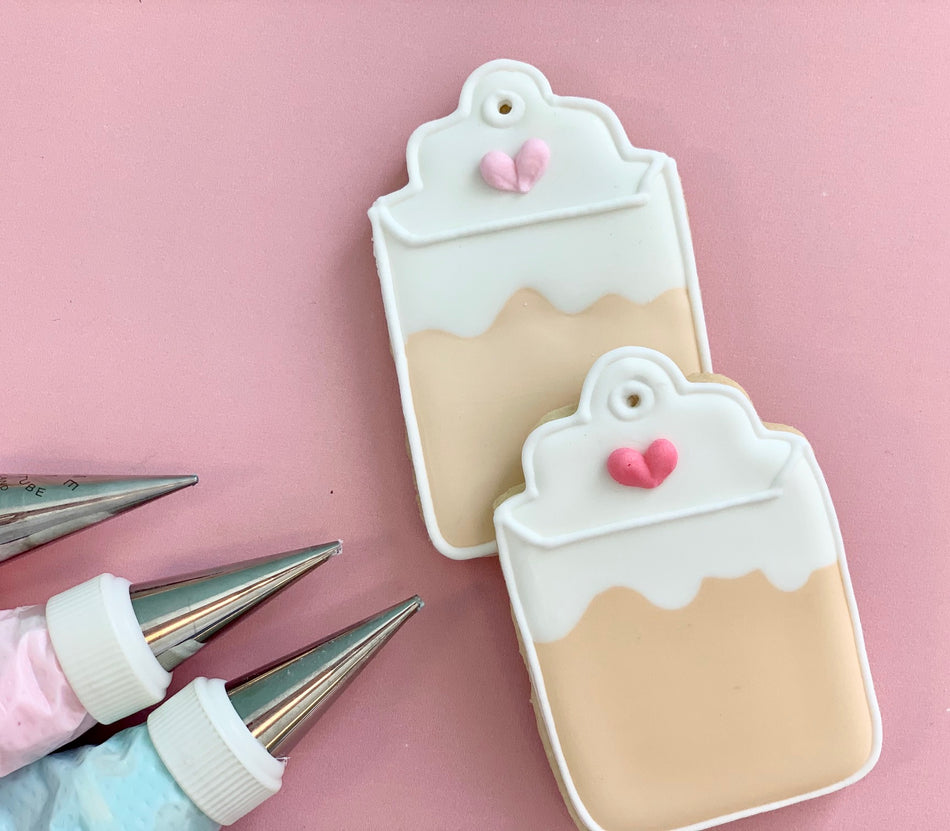
- Gift Tag Cookie Cutter
- Happy Mother's Day Stencil
- Tea-riffic Stencil
- Pink Nonpareils SMALL Sprinkle Pouch
- Decorating Scribe Tool with Beads
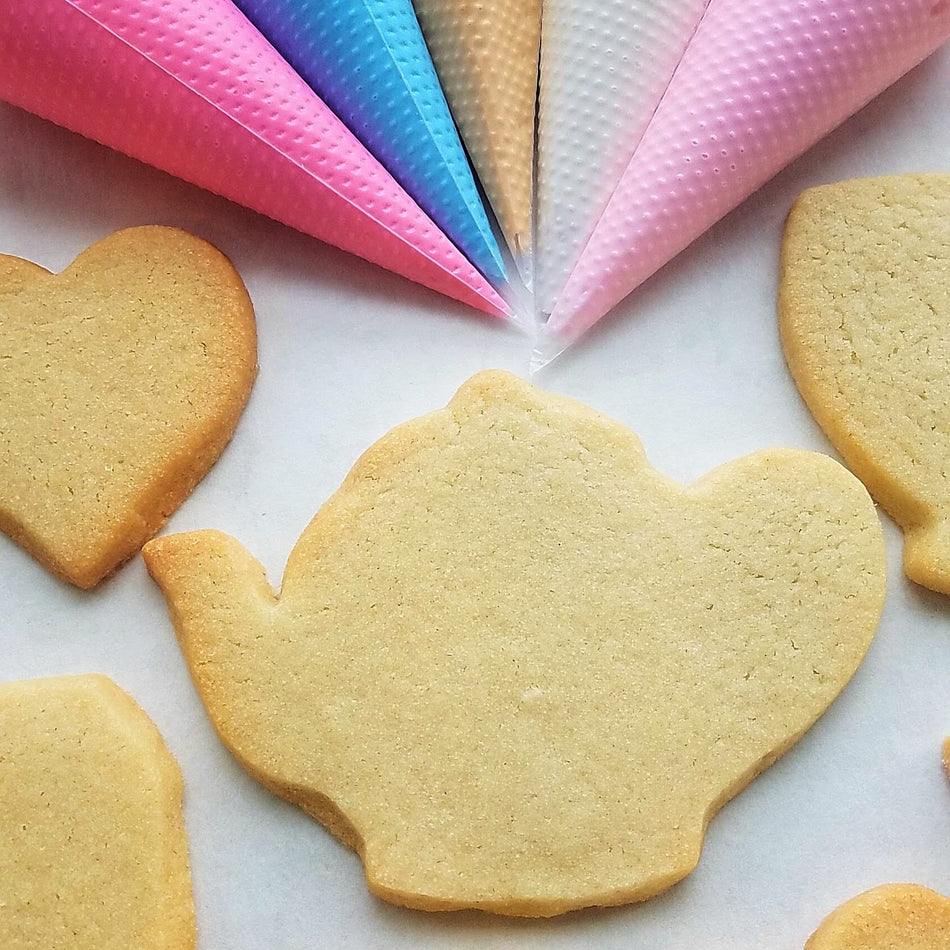
- Tipless Icing Bags SAMPLE 10-Pack
Don't need all of these items?
No worries! You can buy just the items you want!
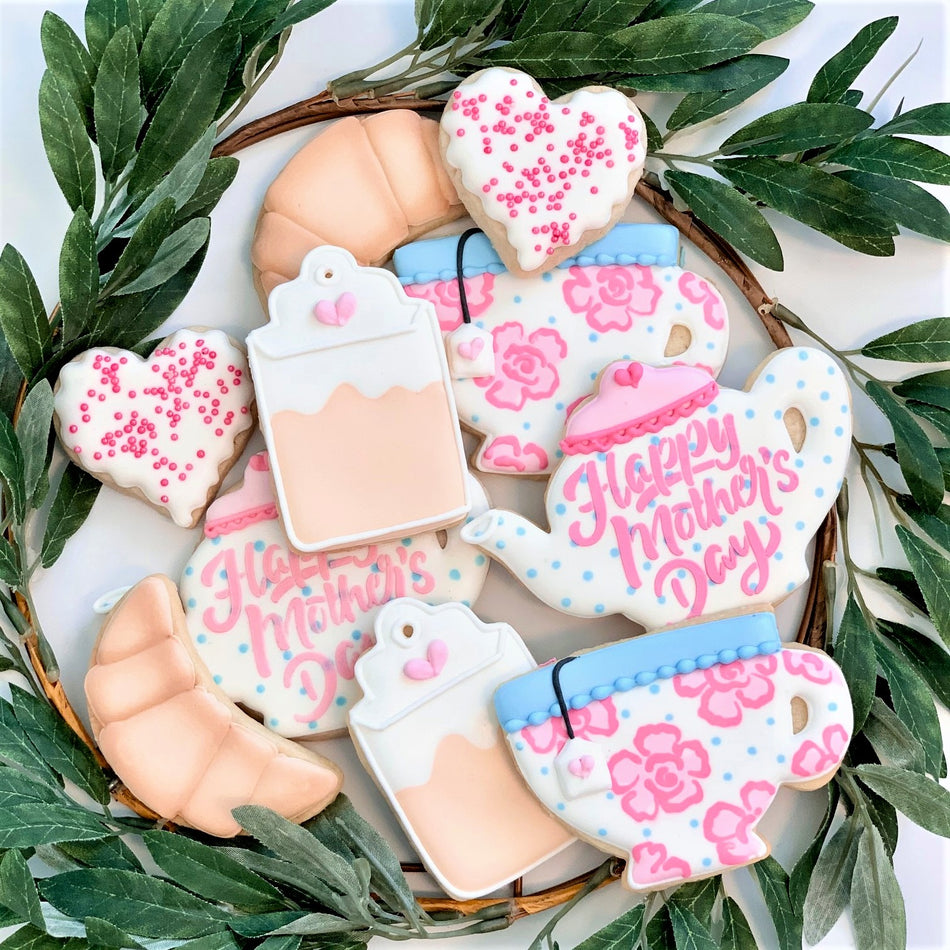
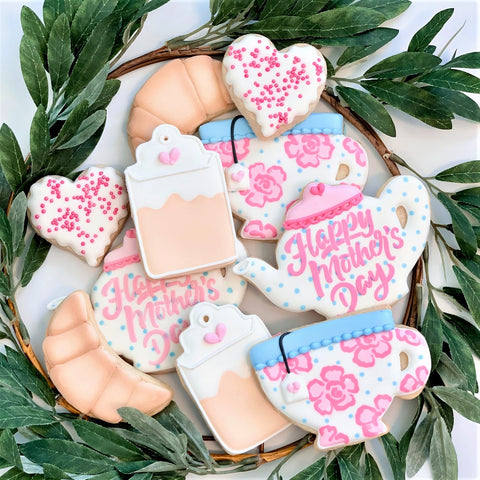
Pick what I needIt’s tea time for Mom! Throw her a yummy tea party for Mother’s Day with this tea cookie set! Learn how to make 5 cookies: The teacup, teapot, teabag, croissant, and the mini heart cookie.
Cookie Yield
COOKIE YIELD:
With a single batch of dough I made 35 cookies: 5 Teacup, 5 Teapot, 5 Teabag, 10 Crossiant, and 10 Mini Hearts. The last three cookies are small, so I had a higher than normal cookie yield! I should note that I roll my cookies to 1/4" thick using the Dough EZ Rolling Mat System. The thickness of your cookies will impact your yield.
For a cookie recipe and rolling and baking video CLICK HERE - this recipe can be doubled in a KitchenAid Mixer.
The essential cutters and stencils can be found in the new Mother's Day Tea Cookie Kit! The kit not only has the 5 essential cutters, but it also has the Happy Mother's Day stencil featured in the video. And, a few bonus tools, like the beaded scribe, the pink nonpareils, and the boo boo stick and tipless bags.

Prepping Royal Icing
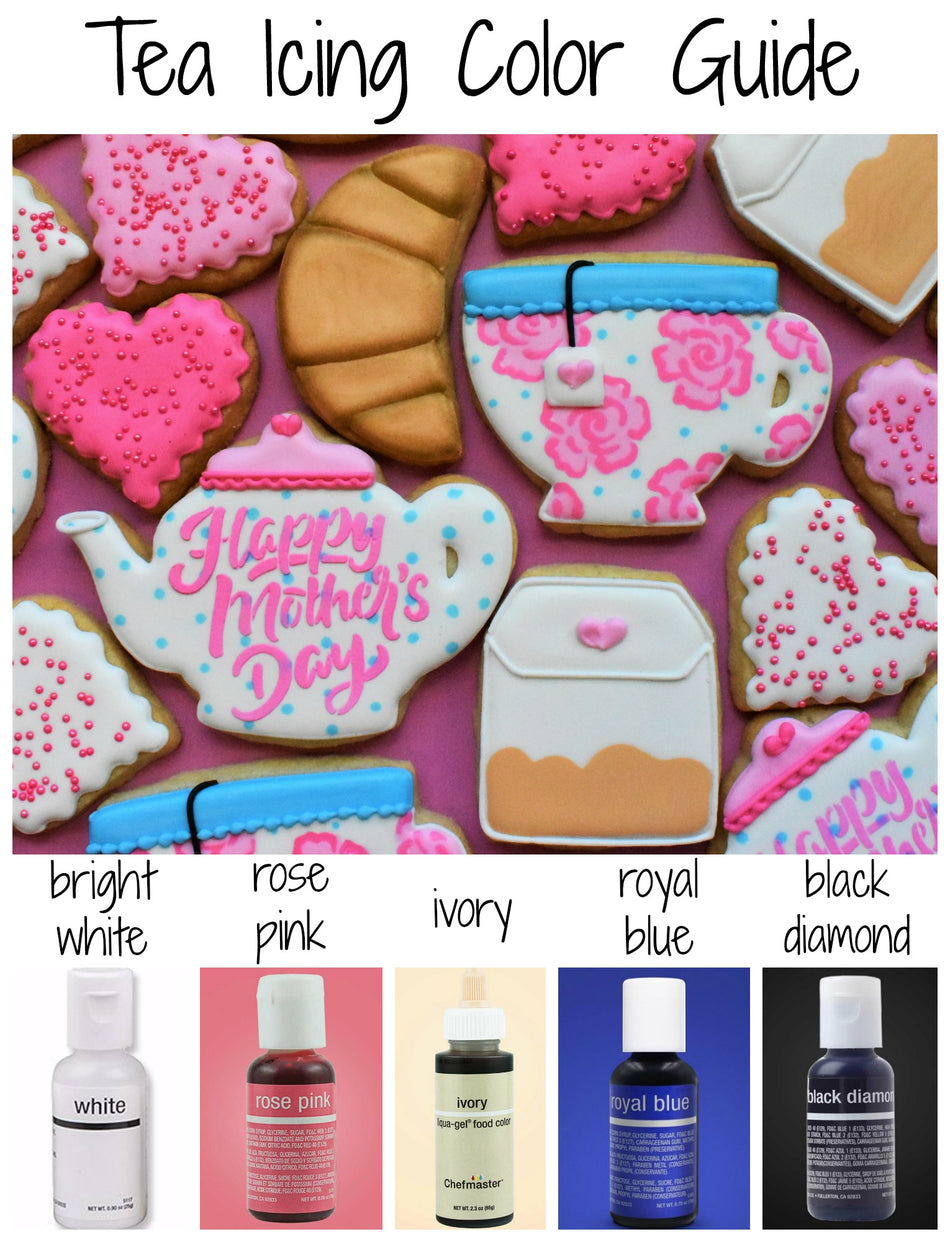
I find it so much easier to make my icing colors using the gel straight from the bottle, no color formulas required. Here's the guide ...

I have been dying to work Rose Pink into a cookie project. It has a bright pink tone compared to the Bakers Rose. I love it!
For a single batch of dough, I typically use a single batch of icing. Since I'm using a KitchenAid mixer, I made a double batch of icing (about 36 oz) and split it in half (reserving half, or 18 oz, for another project).
I don't measure exactly...I estimate. Here's what worked for me on this project:
ICING PLAN BY THE OUNCE
Light Rose Pink - 3 oz (pipe and flood)
Dark Rose Pink - 2 oz (pipe and flood
Ivory - 3 oz (pipe and flood)
White - 8 oz (pipe and flood)
Black - 1/2 oz (this color is optional, I used it to add the string for the teabag)
Royal Blue - 2 oz (pipe and flood)
For a more detailed look at icing planning, CLICK HERE to read this helpful blog post.
ROYAL ICING RECIPE
For a royal icing recipe and video CLICK HERE - this recipe can be doubled in a KitchenAid Mixer.

I love these wet-on-wet whimsical flowers. Download, print, and cut the small template if you want to trace them onto the cookie to guide your flooding.

Project Timeline
I like to break up the decorating process to fit in my schedule. Because there are several phases to decorated cookies, it works better with my life to do a little each day. Here is the schedule for this cookie project and estimated times on how long each phase takes.
DAY 1
Mix Dough (30 mins), Chill Dough (2 hours inactive time), Roll and Bake (1 hour), Mix Royal Icing and Prep Icing Colors - it is helpful to make the colors the day before you decorate because the color will deepen overnight (1 hour).
DAY 2
Outline and Flood Cookies (1-2 hours), Allow to dry in front of fan before adding details (1 hour for standard cookies, but allow 6 hours of dry time on the cookies stenciled with royal icing like the Happy Mother's Day), Piping details, and stenciling (1.5-2.5 hours)
**ALLOW COOKIES TO FULLY DRY 18-24 HOURS BEFORE PACKING. STORE IN A COOL OVEN OVER NIGHT.**
DAY 3
For tips on packing cookies, CLICK HERE to check out this helpful blog post with links to my favorite packing and shipping materials.
More Inspiration
I love making tea sets. Check out these other projects to get inspired to create tea themed cookies!
Here is a fun teacup with an Alice in Wonderland cookie set!

I made many tea sets for my mom! Nothing goes better with tea cookies than cupcakes!!

I made these pink and gold tea cookies for my mom and her friends!

I even made my mom a mini tea set (this was my favorite)! I'm going way back to 2012 with this set!! What a fun project!

Want to come back and remember this post? PIN IT and save it for later!

Recreate these!
I would be so flattered if you recreated these cookies! Be sure to tag @theflourboxshop or use hashtag #theflourbox so I can see what you create!
Happy Decorating!
Anne